budget

Cheap and easy dish cabinet organization

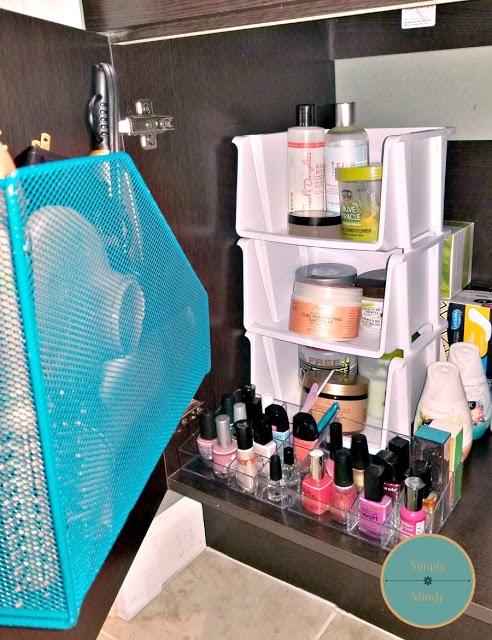
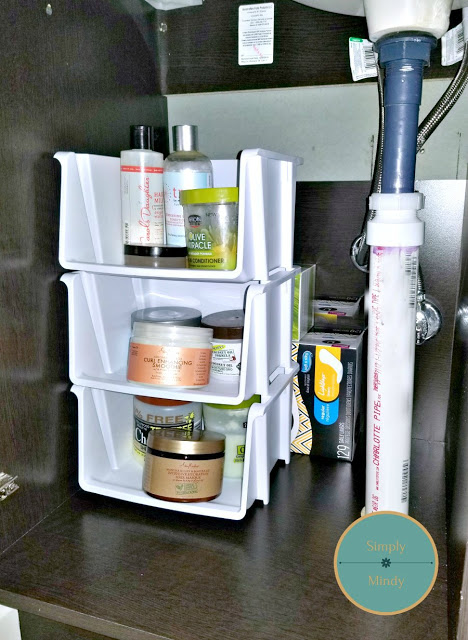
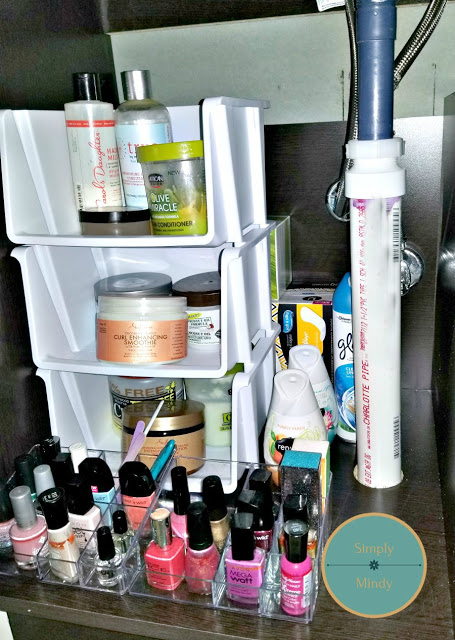
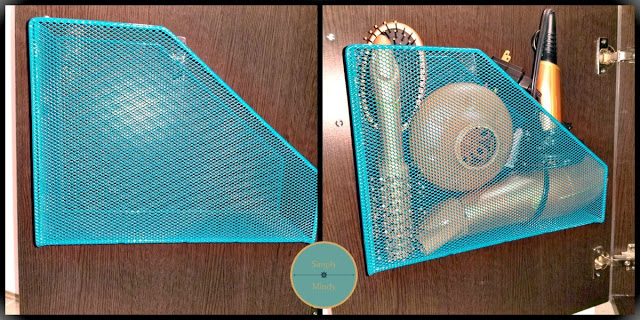
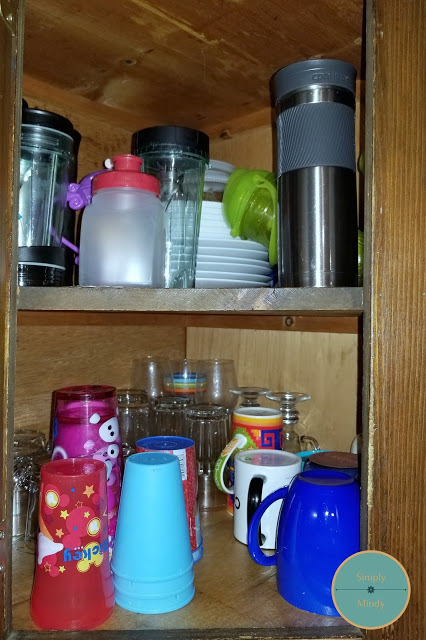
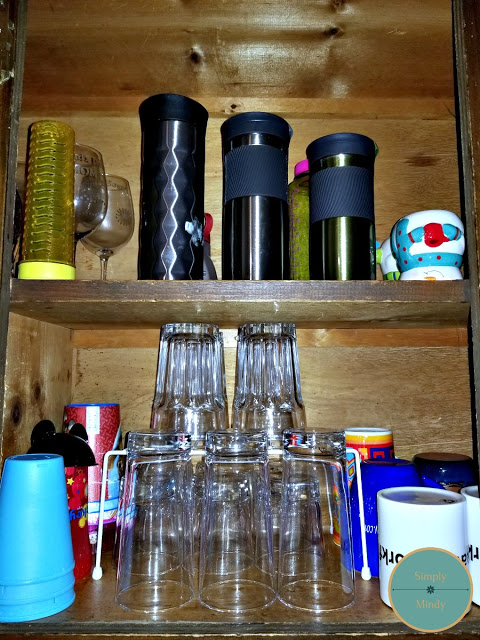
For the longest time, I had been procrastinating about rearranging this cabinet. The corner is soo deep, things can easily get lost in there if you don't pay attention. But, with some rearranging and the addition of a couple of shelf risers, I can now see to the back of the cabinet.

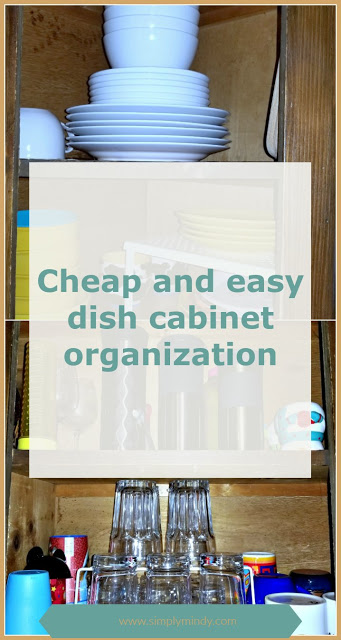
I think the before and after pictures will speak for themselves.

I simply swapped the location of the cups and plates. 
Before


After


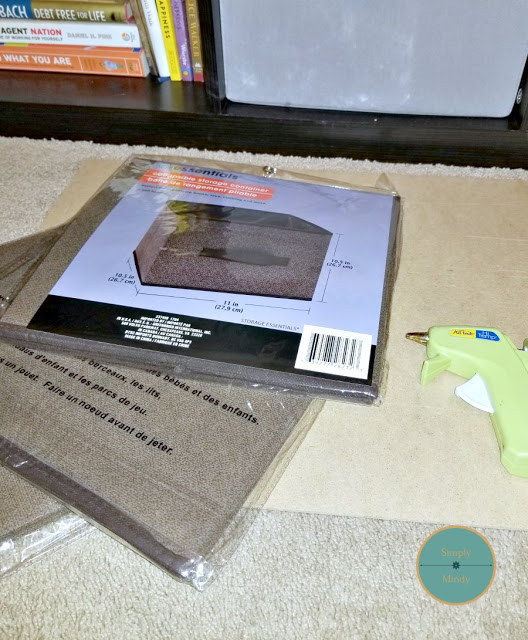
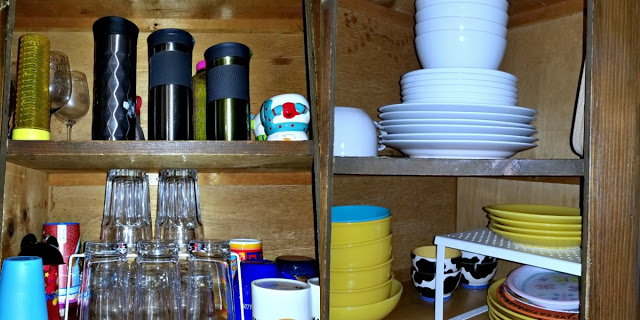
And added a dollar store shelf riser to expand the capacity of the narrower cabinet.


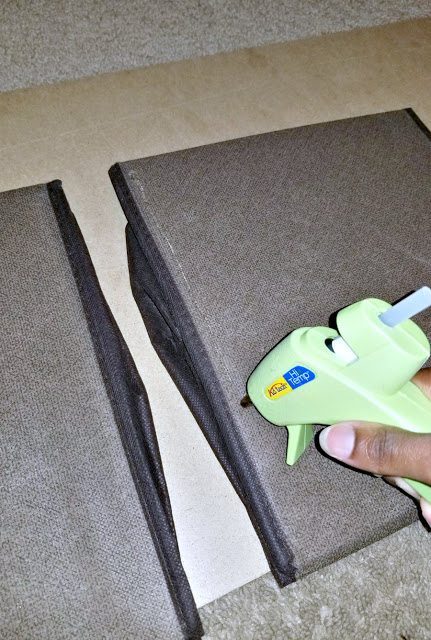
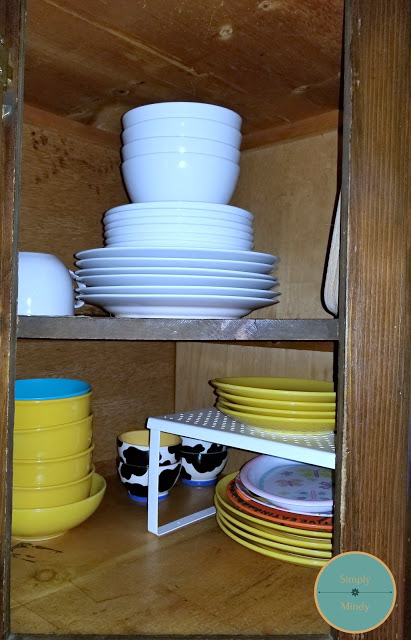
With the plates in the other side ...
Before


I added a larger shelf riser (5.99) to break up the plates/bowls, and make it easier to grab one when needed.
After


Of course, in the process there were some items that went into the trash. But there were also a few items added to our donation bin, which will hopefully go on to a new home where they can be put to use.


If you like the simple functionality of this update, check out these Pins for some more budget friendly kitchen organizing ideas!

Savor and Savvy's 14 Frugal Kitchen Organizing Ideas features ideas for organizing everything, from the utensil drawer to bakeware pans.


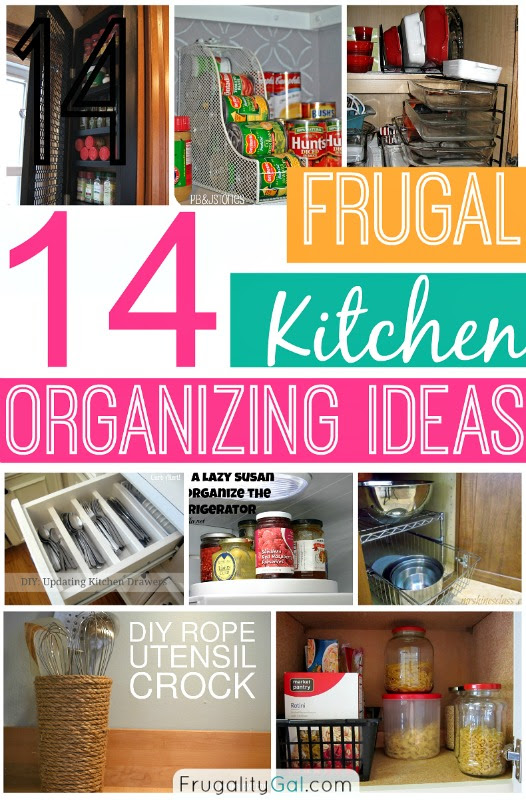
Discover ways to add storage with clever and budget friendly tips from Dreaming in Diy's Easy and Budget friendly ways to organize your Kitchen.

How to Organize a Spice Cabinet on a Tiny Budget!

Today, I'm sharing how I organized my spice (and tea) cabinet for under $10! I didn't go out and buy any fancy jars or containers. I simply decluttered (read threw out expired stuff!) and reorganized the space. Again, I am not striving for perfection but improving function. 

Here are the cabinets before...

And here are the items I purchased for organizing.


 - slim baskets
 - under-shelf basket
 -  clear, 3 compartment organizer with lid


I sorted the spices by type and amount of use. 

Above the spices I added the under shelf basket to hold extra bags of coffee.
The fourth basket is one I had on hand.

*Tip* Use under-shelf baskets in your pantry (or any shelf with space underneath) to hold foil, plastic wrap, zipper seal bags etc.

I repurposed the tiered shelf riser to organize my teas.

I mainly wanted to minimize packaging. These compartment organizers are the perfect size for teabags. Each section fit about 10 bags. I also labeled the front for the teabags not individually wrapped.
I love that I can use the organizer with or without the lid!

But, since I removed the packaging I decided to cut the expiration date off the boxes and added to the back of each container. 

- I used double sided tape to attach the expiration dates. 
This new setup is perfect in my book!  The tea organizer is my favorite. I can clearly see how much of each tea I have on hand. What is your favorite part?


Budget Under Kitchen Sink Organizing

My kitchen is the first room you enter when you open the front door. So, it's only natural that clutter accumulates here. Not only is there clutter on surfaces (which there aren't a lot of), but in the cabinets as well. And while the clutter is generally kept to a minimum (because it is an open area), I know I can get a few areas tidier. 

To start I'm tackling under the kitchen sink. And, I'll warn you now, it's not pretty! But, this is real life. And until we can update the kitchen this is what I'm working with. 😜


To start, I removed everything that was directly under the sink. The shelf to the left goes into a corner and I only keep trays and large bowls that don't fit anywhere else. I did have some jars and cans I've been keeping to upcycle. Those went into a box in the basement until I can get to those projects.

With a clean slate, I started from the back right corner and worked my way to the left. 

  • This shelf riser was previously used in the pantry. It fit perfectly between the water pipe and cabinet wall.

The narrow basket, from Dollar Tree is holding a roll of trash bags. The name brand roll of 45 fits in here like a dream!


And under the shelf riser are things I don't need regularly.


I kept this cleaning caddy (which is actually a shower caddy) in the front because these are my day to day cleaners.


To the left of the shelf riser I added another narrow basket to hold extra cleaners and spray bottles.


In the left hand corner I added a second shelf riser with a shallow basket underneath.


On this riser I have extra dish soap and a couple of spray bottle I use for diy cleaners.

In the basket I'm keeping extra sponges, scrubbers, and extra hand soap.


In the front left I added one more basket (which I had collecting dust in the basement) to keep our water bottles.


And finally, the space left in the front was a perfect fit for my girls' school lunch boxes. It is easy to reach, and makes our school lunch prep easy on everyone.


All in all, I only spent $4 on a few baskets and a shelf riser to take this space from cluttered to functional. When it comes to organizing, it doesn't have to be pretty and perfect, it just has to function for your needs. I hope this inspires you to take control of a cluttered space!

Small Bathroom Organizing


I know I’m not the only one in the world with a small bathroom. But, you know what comes with a small bathroom? A small vanity! Which means a small space for storage. But, don’t be discouraged, you can make the most of the space you have by getting creative with organization.

As part of our recent home renovation, we had our first-floor half bath upgraded to a full (by adding a shower). Now, that doesn’t mean we gained more space for a larger vanity. But, it’s still an upgrade nonetheless. And not having to share a bathroom with the kids makes it all worth it. So, today I’m sharing how I set up the vanity to maximize storage and keeps things neat and organized.


Since I started with a blank slate, this project was easier to tackle.

I started with the drawers, and simply added bins from the Dollar Tree.

-This is the top drawer with the daily essentials…


-The middle drawer holds hair accessories and combs/brushes.

-And lastly, the lesser used items and unmentionables.


Next, I took advantage of the vertical space under the sink by using stackable bins I had initially gotten to use in the pantry. They were 2.99 for the pack of 3.


-I’m storing all my hair creams, conditioners, etc. in the bins. If you’re a curly haired person you know these are essential!


I also added acrylic organizers to store my nail polish, after realizing I wasn’t putting them to use when I had them stored in a covered container.


To finish it off, I added this magazine holder (which was collecting dust in the basement) to the door because I just love this life hack!


-It's attached to the door with the wired command hooks.


I hope you’re able to use to some of these ideas in your own space!  This cost around $13 including the command hooks. I'd love to know if you would do anything differently. Thanks, and God bless!
Living Simply
Mindy✿


Easy Painted Countertop


I had not been planning on painting my countertops, but after I finished painting the backsplash the counters were just screaming “please update me”! The countertops are laminate and they have seen better days. So, since painting the backsplash was successful, I did not think twice about painting the countertop too. I know, you’re probably thinking “she’s crazy…painting the backsplash and countertops!”, but I am happy with the result.

Now, I know there are hundreds of kits out there that you can buy to do this. But, for the sake of time and budget I decided to go with a technique I found on Pinterest using some plain ole acrylic paint. And, just fyi, I was not going for a granite look. I was going for more or less a quartz look.

Here’s what I did


Supplies used
  • acrylic paints (various shades of grey)
  • primer
  • polycrylic sealer
  • dish sponge
  • foam roller
  • stain/varnish brush

Step 1:


Prepped the countertop by taping edges with painter’s tape, wiping it down with rubbing alcohol, then sanding lightly


-I cleaned the sanding dust with a microfiber cloth

Step 2:


Painted the primer on using a foam roller, and a brush for the smaller areas


Step 3:


While the primer was drying, I played with patterns on a piece of paper until I was happy with one


-In the end, I did not end up using the darkest colored paint

Step 4:


Used the sponge to dab on each color in varied patterns


-After the third color, it looked a little blue, so I went back over with the darker color


Step 5:


Sanded lightly and sealed with polycrylic (I did 2 coats)


this is the satin finish while still wet (was kind of dull when dry)


*I initially used the satin finish polycrylic, but ended up getting the gloss finish.


And there you have it! I let the top coat dry for 24 hours, but I didn’t put anything on the counters for a few days just because I was nervous about ruining it. I ended up using my craft knife to cut along the edges of the painters tape so I wouldn’t peel up the polycrylic.

In total, I spent just under $40 because I got both finishes of polycrylic. If I had just gotten the gloss finish it would have cost just under $30. If I were to do this again, I would skip the stain brush and just get the foam roller because it applied the finish much more evenly.

I would love to know what updates your making to your home! Again, thanks and God bless.

Living Simply,

Mindy✿

Multipurpose Collapsible Organizer

Today I have a very quick post for you. As my list grows with projects to complete, I've decided to add a couple of additional posts each month to share some of my easier projects. These will be projects that can typically be completed in a hour or less. A lot less chit chat, just a few pictures and quick steps, so if you wanted to do this you could easily get it done the same day.

I am using this multipurpose organizer for my trunk because I needed something that could hold my reusable shopping bags (that I'm notorious for leaving at home) and those other miscellaneous items that always end up in the trunk.

Ok let's get started.


Step 1:

used hot glue to attach one side of each fabric bin to the other. I only used the glue along the edges.

These are the Dollar Tree fabric storage bins

Step 2: 

expanded the bins and went to organize my trunk


And that's it! A two step and $3 project. It doesn't get simpler that that. Now, your probably wondering why I'm calling this a multipurpose organizer. Well, after I opened it up, I had a thought that with a little finagling you could hang this vertically in a closet and use it as a hanging organizer! What I love about this is you can add as many bins as you want to fit your need.

In addition to the organizer, I want to share this simple first aid kit I put together to keep in the trunk. I have three kids, who are accident prone (they take after me). And, with both my girls in extracurricular activities this year I have to be prepared. 


Cost $7 for everything except the ice pack (which I had on hand)

As always, thanks and God bless!

Living Simply
Mindy ✿