outdoor

Outdoor Beach Themed Chandelier


Today I’m sharing a fun project that was inspired by YouTube. I’ve seen countless tutorials for Diy chandeliers, both for indoor and outdoor use. But I kept seeing a common theme, which was bling. Now, I’m not a very “blingy” girl. So, while the projects I came across were beautiful, they weren’t quite my style. So, I came up with something a little more toned down and that would complement the outdoor décor I had already created.

Just about all the supplies I used were from Dollar Tree, except for the jute rope (that you could find at the dollar store) which I had on hand. In addition to the rope, I used a hanging planter (which I spray painted white), hot glue, shells, and my string lights (which I repurposed for this project). 


Step 1:

secured the rope onto the inner ring of the plant hanger and looped it around 3 of the wire separations, creating a crisscross effect and secured the end with hot glue


I repeated this step 3 times
 – I didn’t measure the rope, just eyeballed it

Step 2:

removed the decorative balls from the string lights and strung 3 of them onto a piece of rope, which I looped around the planter frame (in the open spaces between the rope detail) and secured with a knot.


 - at this point I reinserted the lights into each ball

Step 3:

added decorative shells around the center ring, and secured with hot glue


- This covered up the knots from the rope holding the balls


Step 4:

moved the clips to the wire just above the inner ring, and shortened it so it would be less visible

 – I also attached the string light battery packs to the wire

Here it is hanging from my patio umbrella. 

And there you have it. I hope that description made sense! Let me know what you think. I hope this inspired you to get your creative juices flowing. I would love to see what you come up with! Thanks, and God Bless!

Living Simply,

Mindy ✿

Budget Outdoor Lighting


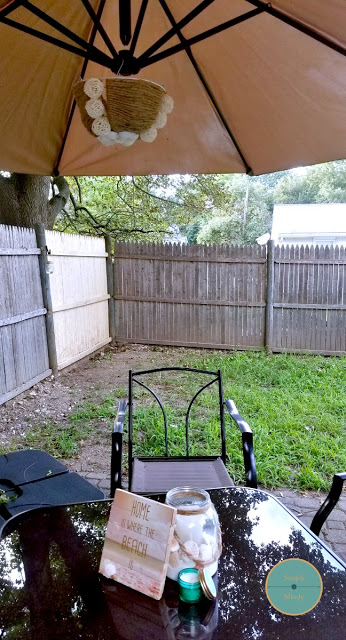
So, I finally got around to cleaning up the backyard because we had an outdoor birthday party for our 6 and 10-year-old daughters. I had decided that adding to the one light we have on the back of the house would give us the option to extend our outdoor living time.

I hadn’t come across very many options for inexpensive outdoor lighting (none that fit my taste anyway). After browsing on Pinterest, I decided to create these two DIY lighting projects. And it just so happens that all the items I used are from Dollar Tree making the cost less than $20.


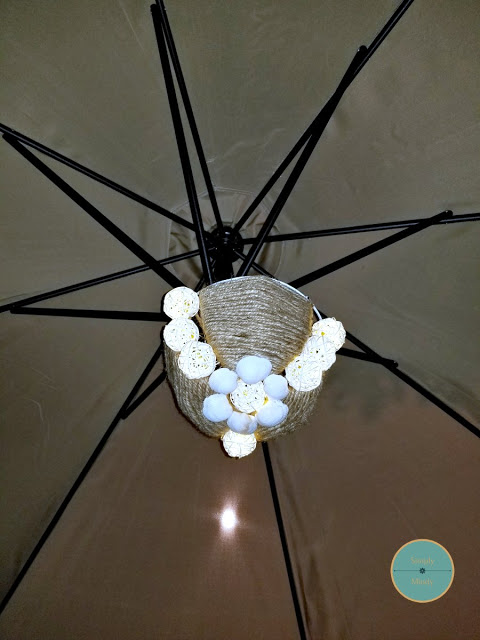
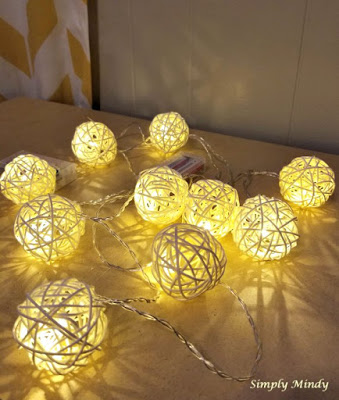
To start I created this easy string light with only two items


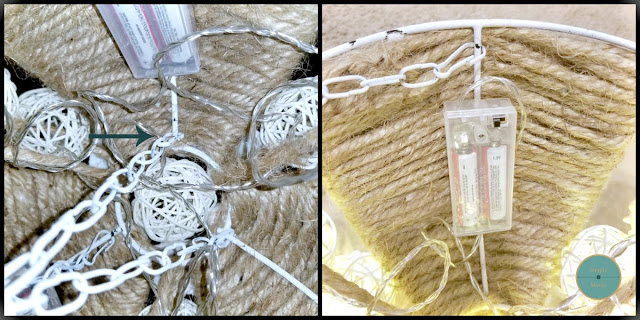
Step 1: cut the cups off this string of lights and added batteries. This light string does say “for indoor use only”, so I will not be leaving it outside.


Step 2: inserted each light into the ball decoration where it fit snuggly to avoid having to glue it. I ended up using 2 ½ packages of the balls.


All done!

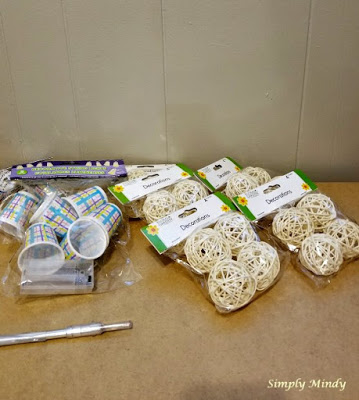
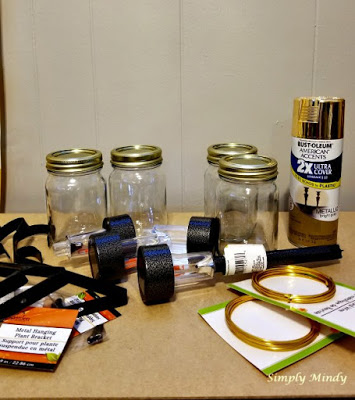
The second project required a little more technique but, was also quick. The supplies are pictured.


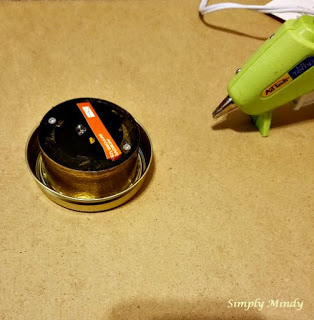
Step 1: removed the stake from the solar light along with the plastic covering and spray painted the rim of the light being sure to cover the solar panel.


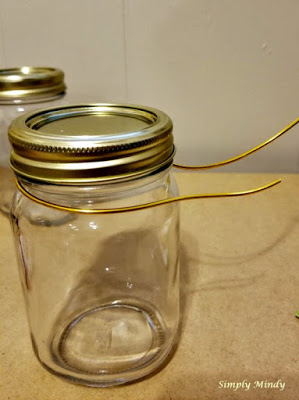
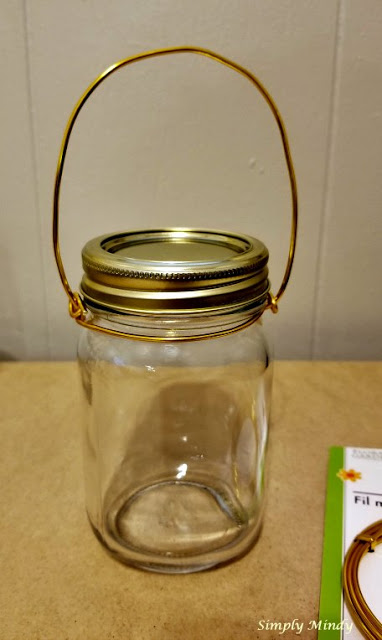
Step 2: while the paint dried, I wrapped the floral wire around the rim of the jar leaving about an inch overhang. Then wrapped the wire onto itself to secure.


Step 3: created a handle and tucked the wire under on the other side of the jar leaving another overhang.


Step 4: wrapped the remaining wire overhang around itself to secure.


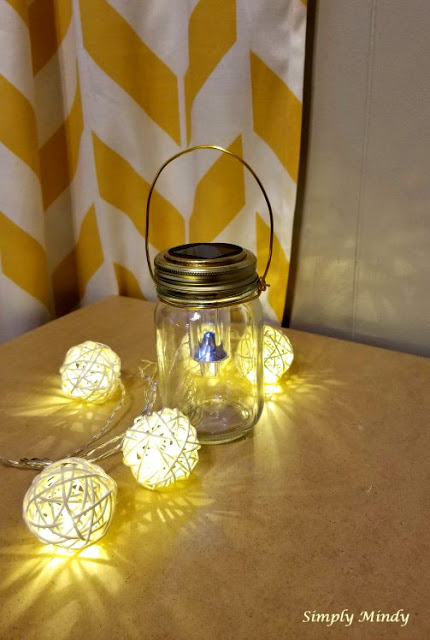
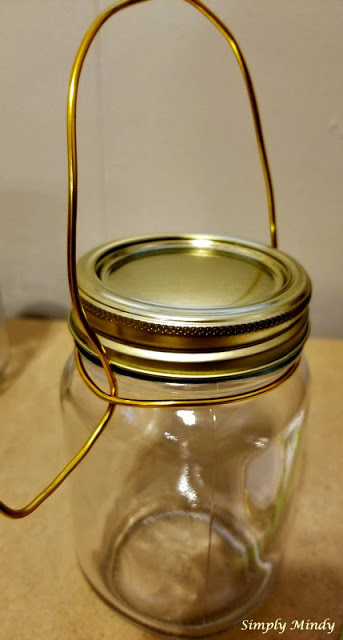
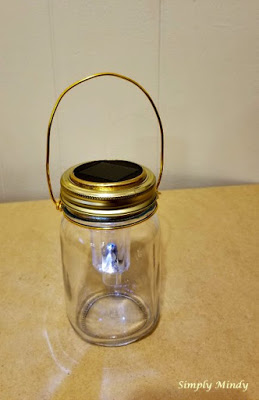
Step 5: attached the solar lantern to the jars outer lid with hot glue. Then secured the lid back on the jar.


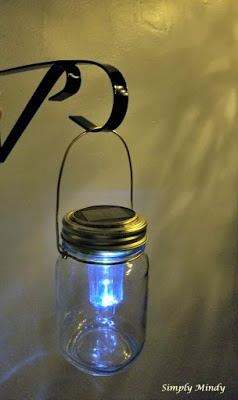
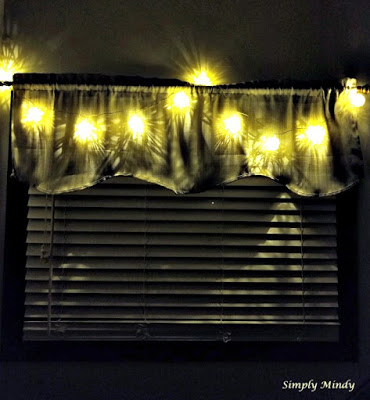
Unfortunately, I couldn’t get a picture outside due to a thunderstorm. But for the sake of showing you how it looks in the dark, here are a couple of shots inside. Isn’t it pretty?


Leave me a comment if you've created your own DIY lighting. I would love to see your ideas! Until next time, keep it simple. Thanks, and God Bless!
Living Simply,
Mindy✿